Stacking firewood may look simple, but it’s more of an art than most people realize. A neatly arranged woodpile isn’t just pleasing to the eye—it’s essential for safety, efficiency, and longevity of your firewood. Anyone who has dealt with a pile of damp, bug-ridden, or rotting logs knows the frustration of bad stacking.
On the other hand, when you master proper techniques, your firewood seasons faster, stays dry longer, and is always ready to keep your home warm during winter nights.
Unfortunately, many homeowners make classic mistakes: stacking directly on the ground, covering the pile entirely with plastic, or cramming logs together too tightly. These habits trap moisture, encourage rot, and can even attract termites right to your doorstep. That’s why expert techniques are worth learning.
In this guide, we’ll explore seven proven tips that transform your firewood stacks from chaotic heaps into perfectly structured, long-lasting supplies of fuel.
Whether you burn wood daily in a fireplace, rely on it for heating, or just enjoy the occasional bonfire, mastering these tips will save you time, effort, and headaches. So grab your gloves, pick up your splitting axe, and let’s dive into the art of stacking firewood like a pro.
7 Genius Hacks for Stacking Firewood
- Tip 1 – Choose the Right Location for Your Woodpile
- Tip 2 – Elevate the Wood Off the Ground
- Tip 3 – Stack Wood for Maximum Airflow
- Tip 4 – Stack for Stability and Safety
- Tip 5 – Protect Your Woodpile from Weather
- Tip 6 – Season and Rotate Your Firewood
- Tip 7 – Organize by Size and Type of Wood
Tip 1 – Choose the Right Location for Your Woodpile
Where you put your firewood is just as important as how you stack it. Think about it—firewood is meant to dry, stay dry, and remain accessible all year round. If you dump your logs in a shady corner next to your house, you’re basically inviting moisture, bugs, and mildew into the pile. Worse yet, pests like carpenter ants and termites can move from your woodpile straight into your walls.
The ideal spot for a woodpile is close enough for easy access but far enough to protect your home from pests. Most experts recommend keeping stacks at least 20–30 feet away from the house. That way, you don’t have to trek across the yard in the snow to fetch wood, but you’re also not setting up an insect buffet right against your siding.


Another factor is sunlight. A sunny spot helps logs dry faster, especially if you cut green wood that needs seasoning. Shade, on the other hand, slows down evaporation and encourages moss or mold growth. Pair that with poor airflow, and you’ll end up with spongy, smoky wood that refuses to burn properly.
Elevation matters, too. If your chosen spot is in a low-lying area where water collects, you’re asking for trouble. Even with the best stacking technique, logs sitting in damp soil will rot from the bottom up. Choose a spot with good drainage and airflow, ideally slightly raised from the ground.
Lastly, think about convenience. If you’re going to use your firewood daily in winter, trudging across an icy yard with an armful of logs isn’t fun. Consider splitting your supply into two piles: one larger storage pile farther away and a smaller, easy-access stack closer to the house for daily use. This approach keeps pests away while making life easier when temperatures drop.
Tip 2 – Elevate the Wood Off the Ground
Nothing ruins a woodpile faster than ground contact. The soil holds moisture, and once your logs absorb that dampness, they start to rot. Even worse, ground contact creates a welcoming habitat for bugs, mold, and fungi that chew away at your carefully cut firewood. This is why elevating your woodpile is non-negotiable if you want usable, long-lasting fuel.
The good news? Elevation doesn’t have to be complicated. The simplest solution is using old wooden pallets, which are sturdy, cheap (often free), and designed to allow airflow underneath. Just lay them down, stack your logs, and you’ve instantly improved ventilation. Another option is metal firewood racks—a bit pricier, but extremely durable and built to withstand years of stacking and unstacking.
If you prefer a DIY approach, you can use cinder blocks or stones to lift your logs off the ground. Place two rows side by side, lay long poles or treated lumber across the top, and you’ve created a solid, elevated base. Some people even use leftover fence posts or old railroad ties. The key is stability—you don’t want your base shifting under the weight of a full stack.
Elevation also protects your logs during heavy rain or snow. Even if water collects around the pile, it won’t seep into the bottom row. Plus, airflow underneath speeds up drying, making seasoning more effective.
One mistake many people make is stacking firewood directly on concrete. While it seems solid, concrete absorbs moisture and holds it against your logs. Unless you add a raised rack or slats, you’ll still face rot issues. Always leave at least a few inches of clearance between the ground (or concrete) and your first row of logs.
Think of it like putting shoes on your woodpile—just as you wouldn’t walk barefoot in the mud, your logs shouldn’t sit directly on damp soil. Elevate them properly, and you’ll extend the life and quality of your firewood dramatically.


Tip 3 – Stack Wood for Maximum Airflow
Firewood dries through exposure to air, so the way you arrange your logs makes all the difference. Imagine stuffing wet clothes into a plastic bag—they’ll stay damp, maybe even start to smell. But spread them out on a clothesline, and they dry beautifully. Firewood works the same way: air circulation is your best friend when seasoning and storing wood.
The traditional way is stacking in straight rows with small gaps between logs, which lets air move freely through the pile. Avoid cramming pieces tightly together; a little breathing space helps moisture escape. If you’re storing multiple cords, leave a few inches of space between stacks to maximize airflow.
Some people swear by special stacking techniques. The German Holz Hausen method builds a circular, beehive-shaped pile that looks impressive and dries surprisingly well. The Scandinavian round pile is similar, designed for both airflow and stability. These methods take practice, but they turn your woodpile into both a drying machine and a backyard centerpiece.
Another effective approach is the crisscross stack. By alternating log direction in each layer, you create natural air channels throughout the pile. This method is great for smaller stacks or for building sturdy ends to long rows.
Seasoned wood burns hotter, cleaner, and more efficiently than green wood. By stacking for airflow, you cut seasoning time significantly—sometimes shaving months off the process. That means less waiting and more reliable firewood when winter hits.
If you want your wood to be ready faster, don’t just stack it—stack it smart. Treat your pile like a living thing that needs to “breathe,” and it’ll reward you with dry, crackling logs that catch fire instantly instead of smoldering with frustration.
Tip 4 – Stack for Stability and Safety
A towering woodpile might look impressive, but if it collapses, it can cause serious damage—or worse, injury. Stability should be your top priority when stacking, especially if kids or pets play nearby. A poorly balanced pile can topple like dominoes with just a strong gust of wind.
Start with a solid, level foundation before you build upward. If your base is uneven, the entire stack will lean and eventually fall. Use blocks, pallets, or treated lumber to create a flat platform. If you’re stacking directly on dirt, take time to level the ground first.
When building tall stacks, think of it like laying bricks. Place larger, heavier logs on the bottom and gradually move to smaller, lighter pieces toward the top. Keep rows straight and tight, but not so tight that airflow is blocked. If you notice gaps forming, adjust as you go rather than trying to force a log into place.
Adding end supports makes a huge difference. You can build log cribs at both ends of your pile by crisscrossing logs to form a stable wall. These not only hold the pile together but also improve airflow. For longer rows, consider adding support posts or racks along the length.
One of the most common mistakes is stacking wood too high. Anything over five feet becomes unstable unless you’re using racks or additional bracing. Remember, safety first—you don’t want a toppling pile ruining all your hard work.
Another danger is irregularly shaped logs. Crooked or uneven pieces can throw off balance if placed carelessly. Save them for the middle of the stack where they’ll be supported by straighter logs on either side.
Think of your pile as a wall: every log has a place, and every piece contributes to the structure. By stacking carefully with stability in mind, you’ll have a woodpile that not only stands firm all year but also gives you peace of mind knowing it won’t come crashing down unexpectedly.
Tip 5 – Protect Your Woodpile from Weather
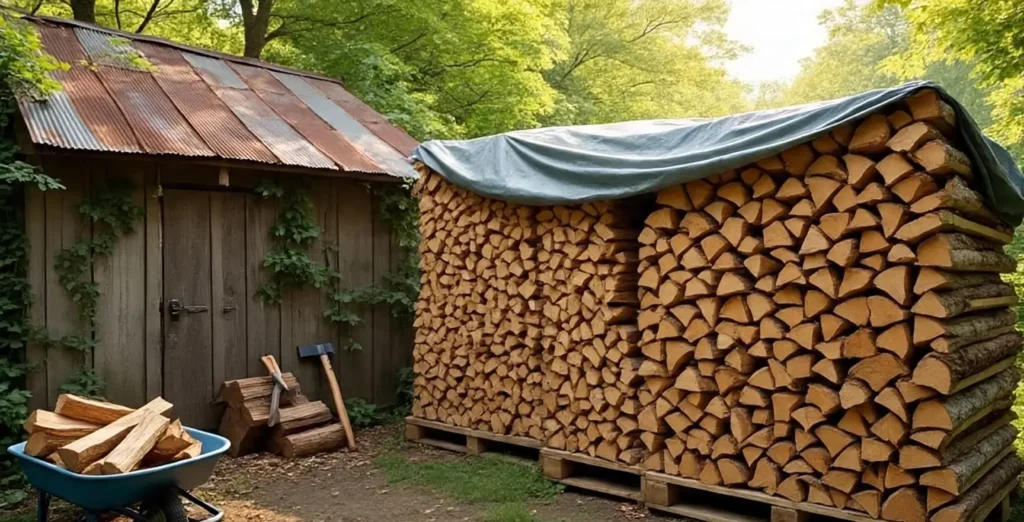
While airflow is crucial, protection from the elements is equally important. Too much exposure to rain and snow soaks your wood, undoing months of seasoning. On the flip side, completely wrapping your pile traps moisture inside, creating a moldy, unusable mess. The secret lies in protecting the woodpile while allowing it to breathe.
The most effective method is covering only the top of your stack, leaving the sides open for ventilation. A simple tarp works, but secure it tightly so wind doesn’t blow it off. Don’t drape it down to the ground—that suffocates airflow. Instead, cover just the top few rows and let air move freely around the sides.
If you want a longer-term solution, invest in a firewood shed or custom cover. These structures shield your wood from rain and snow while keeping air circulation high. Even a lean-to style shed with a sloped roof can make a huge difference.
Plastic wraps and shrink covers may look neat, but they’re the worst option for firewood. They trap humidity, practically guaranteeing rot. Remember, your goal is to balance protection with drying.
Another overlooked trick is positioning your woodpile with the prevailing wind direction. If you orient the open side of your pile toward natural breezes, you’ll get better drying power without needing fans or extra effort.
Protecting your woodpile isn’t just about keeping it dry—it’s about making sure all your hard work cutting, splitting, and stacking pays off. Nothing is more frustrating than reaching for logs in January only to find them frozen together in a soggy mess. With the right cover strategy, your firewood stays dry, clean, and ready to burn no matter what the weather throws your way.
Tip 6 – Season and Rotate Your Firewood
If there’s one golden rule of firewood, it’s this: wet wood is useless wood. Freshly cut logs, known as “green wood,” contain a high level of moisture—sometimes over 50%. Trying to burn them leads to smoky fires, creosote buildup in your chimney, and a whole lot of frustration. That’s why seasoning firewood properly is a must.
Seasoning means letting your wood dry out over time, reducing moisture to about 20% or less. On average, this takes 6 months to 2 years, depending on the type of wood and climate. Hardwoods like oak can take over a year, while softwoods like pine may season in just a few months. The key is patience, airflow, and smart stacking.
Splitting wood before stacking speeds up seasoning dramatically. Smaller pieces dry faster than whole rounds because more surface area is exposed to air. Always split your logs as soon as possible after cutting, then stack them in rows that allow the wind to pass through freely.
Rotation is another critical step. Think of your woodpile like a pantry—use the oldest “stock” first. If you keep piling fresh logs on top of seasoned ones, you’ll end up with a bottom layer that never gets used, slowly rotting away. Instead, organize your stacks so that the wood you cut first is always the first you burn.
To tell if your firewood is seasoned, look for signs like cracks in the ends of the logs, lighter weight, and a hollow sound when two pieces are knocked together. Properly seasoned wood burns hot, with minimal smoke and maximum efficiency.
Some people try shortcuts, like storing wood in sealed garages or covering it entirely with tarps, but these methods usually backfire. Seasoning is all about nature doing its job—air, sun, and time are your best tools.
By seasoning and rotating properly, you’ll never face the disappointment of damp, smoldering logs. Instead, you’ll enjoy strong, clean-burning fires that keep your home cozy and safe all winter long.
Tip 7 – Organize by Size and Type of Wood
A well-organized woodpile isn’t just nice to look at—it saves you time and energy when it matters most. Imagine coming inside on a freezing night, only to realize you have to dig through a jumbled heap of logs to find kindling. Frustrating, right? That’s why sorting firewood by size and type makes a big difference.
Start by creating separate sections for kindling, medium logs, and large logs. Kindling (small, thin pieces) catches fire quickly, helping you get a strong flame going. Medium logs keep the fire steady, while large logs burn slowly, providing long-lasting heat. Having them sorted means you can build a fire efficiently without wasting time hunting for the right size.
Organizing by wood type is just as important. Hardwoods like oak, maple, and hickory burn hotter and longer, making them perfect for overnight fires. Softwoods like pine and spruce ignite quickly, ideal for kindling or quick, hot fires. If you mix everything together, you’ll constantly struggle with unpredictable burns. Keeping separate stacks—or at least separate sections within a stack—lets you choose the right wood for the right moment.
Another hack is labeling your stacks by season or cutting date. Use a marker on a scrap piece of wood or even spray paint on the log ends. That way, you’ll always know which pile is ready to burn and which one still needs time to season.
For people with limited space, consider using stackable firewood racks or wall-mounted storage for kindling. Indoors, keep a small, neat stack of seasoned wood near the fireplace, but never bring in bulk firewood—it can carry insects into your home.
Organizing isn’t about being overly fussy; it’s about making your life easier when you need warmth fast. With a properly sorted pile, you’ll never waste energy fumbling in the cold. Instead, you’ll build perfect fires effortlessly, every single time.
Additional Tips for Long-Lasting Firewood Stacks
Beyond the seven core strategies, there are extra steps that make a big difference in the longevity and quality of your woodpile. First and foremost: pest prevention. Firewood attracts termites, ants, and even rodents. To minimize risk, keep stacks at least 20 feet from your house and avoid stacking directly against fences or sheds. Sprinkle diatomaceous earth or use natural deterrents like cedar chips around the pile to discourage unwanted visitors.
Another key tip is knowing when to restack your firewood. Over time, piles settle, and airflow can decrease. If you notice sagging or leaning stacks, it’s worth taking an afternoon to rebuild them. Not only does this restore stability, but it also prevents the bottom layers from staying damp and unusable.
If you live in a smaller space or urban setting, firewood racks are your best friend. These metal or wooden frames allow you to store smaller quantities neatly while keeping everything elevated. Many come with covers designed specifically to protect only the top layer, ensuring both airflow and weather protection.
Some homeowners also build multi-tiered storage systems—a large outdoor shed for bulk storage, plus a small, covered rack near the house for daily use. This dual approach ensures convenience without sacrificing protection.
Finally, always think about safety. Don’t stack firewood near fire pits or grills, since stray sparks can ignite dry logs. And never store large amounts indoors—besides pests, improperly ventilated wood can add moisture to your home and even pose a fire hazard.
By following these extra tips, your woodpile won’t just survive the seasons—it’ll thrive. You’ll save time, preserve your investment, and always have reliable, high-quality firewood ready when you need it.
You May Also Like To Read:
Final Thoughts:
Stacking firewood is more than tossing logs into a pile—it’s a skill that combines practicality, safety, and efficiency. By choosing the right location, elevating off the ground, maximizing airflow, ensuring stability, protecting from weather, seasoning and rotating, and organizing by size and type, you set yourself up for success.
A well-stacked woodpile keeps your firewood dry, safe, and ready to burn, while also giving you peace of mind and even a little backyard pride. Add in pest prevention, smart rotation, and clever organization, and you’ll never struggle with damp, smoky, or unstable piles again.
At the end of the day, a perfect woodpile means warm nights, efficient fires, and the satisfaction of knowing your hard work pays off. So grab your gloves, sharpen your axe, and start stacking smarter—it’s one of the simplest yet most rewarding skills you can master for a cozy, fire-lit home.
FAQs
How far should firewood be stacked from a house?
At least 20–30 feet to avoid pests like termites moving into your home.
What’s the fastest way to season firewood?
Split it, stack it off the ground with plenty of airflow, and keep it in direct sunlight if possible.
Should I cover firewood in the summer?
Cover only the top to protect from rain, leaving the sides open for ventilation.
How do I know if my firewood is too wet to burn?
Wet wood feels heavy, has a shiny surface, and produces a dull “thud” instead of a hollow sound when struck together.
Can I stack firewood indoors?
Only small amounts of fully seasoned wood should be stored indoors to avoid pests and excess moisture.
Affiliate Disclosure: Fireplaceadviser.com is a participant in the Amazon Services LLC Associates Program. We may earn a commission when you click on certain links on this site and purchase.

Hello!! I am Jamal Khan. I often fix my home electric heaters and gas stove problems and research the common issues in the heating units to improve my knowledge and expertise. The aim of establishing fireplaceadviser.com is to share my expertise and knowledge with my audience.