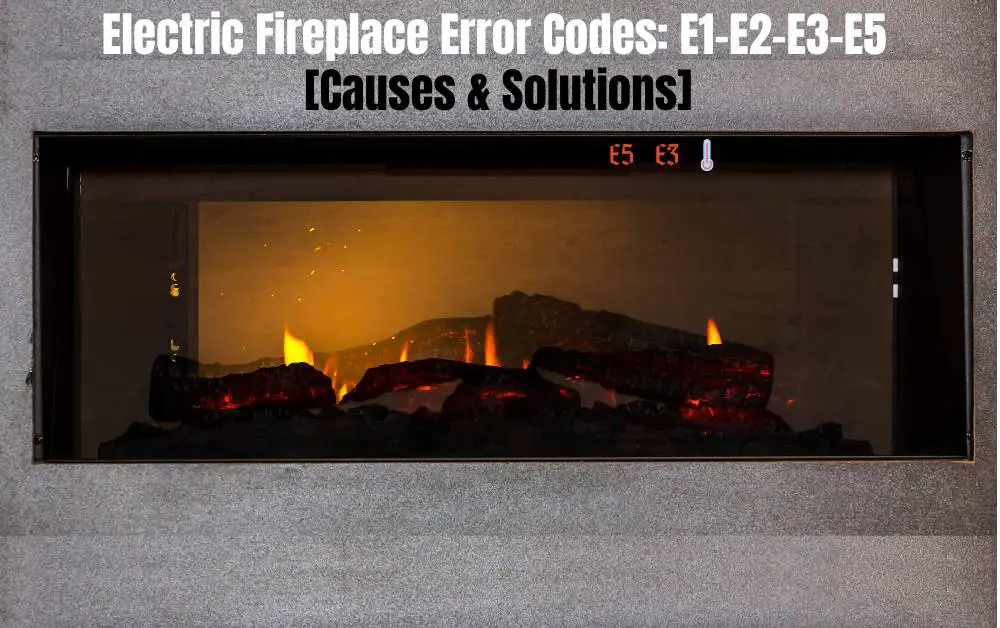
Featuring a $400 Brick Fireplace Transformation with Electric Insert Integration
Electric fireplaces have become a go-to solution for homeowners seeking charm, warmth, and energy efficiency—without the maintenance of wood or gas options.
This case study highlights a budget-conscious DIY project that transformed a dated brick fireplace into a stunning electric centerpiece for under $400.
Budget-Friendly DIY Electric Fireplace Makeovers
Project Background
- Homeowner: Sarah M., a DIY enthusiast from Columbus, Ohio
- Project Goal: Modernize a 1980s red brick fireplace using an electric insert while maintaining the original mantle
- Total Budget: $400
- Time to Complete: 2 weekends
Before Makeover
Sarah’s original fireplace was a large, floor-to-ceiling red brick design common in older homes. While structurally sound, it looked outdated and clashed with her contemporary living room aesthetic. She wanted:
- A modern, clean-lined look
- A functional heat source that didn’t require venting
- A cost-effective solution she could complete herself
DIY Makeover Steps
1. Planning & Measuring the Insert Space
Sarah began by measuring the firebox opening to ensure compatibility with electric inserts. She selected a recessed electric fireplace insert (36-inch) with the following specs:
- Brand: Touchstone Sideline®
- Cost: $289 on sale
- Features: 5 flame settings, remote control, 750W/1500W heating, and realistic logs
Key Tip: Electric fireplace inserts must match or slightly undercut the opening width. Adding trim later can cover any small gaps.
2. Brick Surface Transformation
The red brick was too dominant for the updated aesthetic, so Sarah chose to whitewash the brick using a water-based paint solution:


- Materials:
- 1 quart flat latex paint ($15)
- Sponge, bucket, and drop cloth
- Method:
- Mixed 1:1 paint and water
- Applied with sponge and wiped with a rag for a rustic-modern look
Time Spent: 3 hours
Total Cost: $15
3. Insert Framing & Installation
Sarah created a support frame using 2x4s ($30) to hold the electric insert flush with the existing firebox.
- Tools Used: Miter saw, drill, screws
- Important Step: Added an in-wall rated extension cord to safely power the insert inside the firebox (per NEC Code 422.16)
Total Cost: $30 for framing materials + $10 for fire-rated extension
4. Mantel Preservation & Paint Touch-Ups
The original oak mantel was in good shape but had an orange tint. Instead of replacing it, Sarah:
- Lightly sanded and painted it matte black for contrast using a quart of high-heat paint ($18)
Final Touch: Added peel-and-stick shiplap panels above the mantel for texture ($38 from Home Depot)
Total Costs Breakdown
| Item | Cost |
|---|---|
| Electric Fireplace Insert | $289 |
| Whitewash Supplies | $15 |
| Lumber & Fire-Rated Cable | $40 |
| Mantel Paint | $18 |
| Shiplap Accent | $38 |
| Total | $400 |
Final Results
- The new fireplace now serves as a visual anchor in the living room.
- The electric insert provides supplemental heat, lowering HVAC use during cooler months.
- The entire project was code-compliant, required no venting, and was completely DIY.
Why It Works
- Electric inserts are safe and affordable: Ideal for retrofitting existing fireboxes.
- Whitewashing brick is transformative: Inexpensive and visually impactful.
- Retaining and repainting mantels saves money: Painting can modernize existing wood features.
- All-in-one electric units simplify installation: No need for chimneys or gas lines.
Homeowner Quote
“I honestly thought a modern fireplace look was out of reach. But with $400, some creativity, and weekend elbow grease, I now have a fireplace I love—and it even heats the room!”
— Sarah M., Columbus, OH
Key Takeaways for DIYers
- Electric fireplace inserts are beginner-friendly, especially with a framed-in firebox.
- Focus your budget on the insert, then use paint and trim for affordable cosmetic upgrades.
- Safety is crucial: Use fire-rated electrical components and follow NEC guidelines.
Affiliate Disclosure: Fireplaceadviser.com is a participant in the Amazon Services LLC Associates Program. We may earn a commission when you click on certain links on this site and purchase.

Hello!! I am Jamal Khan. I often fix my home electric heaters and gas stove problems and research the common issues in the heating units to improve my knowledge and expertise. The aim of establishing fireplaceadviser.com is to share my expertise and knowledge with my audience.