If you’re a wood stove owner, you understand that proper venting is crucial for maximizing efficiency, ensuring safety, and maintaining comfort in your home. Among the various venting options available, wood stove horizontal venting has gained significant popularity.
This method not only allows for flexible installation but also enhances the performance of your stove. In this comprehensive guide, we’ll delve into the details of horizontal venting, exploring its benefits, installation tips, and common pitfalls to avoid.
Whether you’re considering a new setup or looking to improve your existing system, understanding wood stove horizontal venting can make all the difference in your heating experience.
Wood stoves must be vented above the roof for proper exhaust, effective draft, and reduced creosote buildup. Pellet stoves can be vented horizontally through an exterior wall due to their lower emissions. Always follow local codes, use appropriate materials, and perform regular maintenance for safe and efficient operation of wood and pellet stove venting systems.
What Wood Stove Horizontal Venting Means?
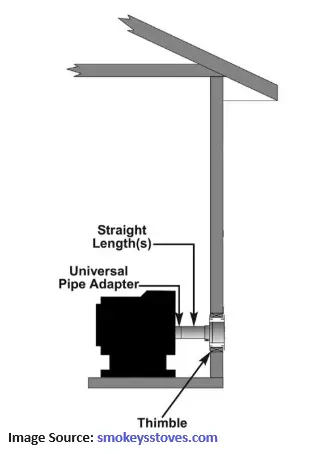
Horizontal venting refers to the installation of vent pipes that run parallel to the ground, allowing exhaust gases from the wood stove to exit the home through an exterior wall. This method contrasts with vertical venting, where the pipes rise vertically through the roof.
Horizontal venting systems typically consist of a series of pipes that connect the stove to the outside, often featuring a termination cap to prevent rain and debris from entering.
Is Wood Stove Horizontal Venting Safe?
If you have a pellet stove, it can be vented horizontally through an exterior wall. Pellet stoves are designed to burn compressed wood pellets, which produce less smoke and particulate matter compared to traditional wood stoves. This allows for more flexibility in venting options.
Horizontal venting for pellet stoves requires careful installation to ensure that the flue gases are expelled safely and efficiently. It is essential to maintain a slight upward slope in the vent pipe to facilitate proper drainage and prevent condensation.
On the other hand, if you have a wood stove, it must be vented above the roof to ensure proper exhaust of smoke and gases. This vertical venting is crucial for maintaining an effective draft, which enhances combustion efficiency and minimizes the risk of smoke back drafting into the living space.
Venting above the roof helps to reduce the potential for creosote buildup, a flammable substance that can accumulate in the chimney and pose a fire hazard.
Advantages of Wood Stove Horizontal Venting Over Other Methods
- Flexibility in Installation: Horizontal venting can be particularly advantageous in homes where roof access is limited or where a vertical chimney installation would be impractical.
- Space Efficiency: This venting method can save space, allowing for a more streamlined installation in smaller homes or tight spaces.
- Reduced Heat Loss: Since horizontal venting minimizes the distance that exhaust gases must travel, it can help retain more heat within the home.
Step-by-Step Guide to Installing Horizontal Venting
Installing a horizontal venting system for your wood stove can be a straightforward process if you follow these steps:
1. Assess Your Wood Stove and Room Layout
Before beginning the installation, assess the layout of your room and the location of your wood stove. Ensure that there is a clear path for the vent pipe to exit through an exterior wall.
2. Determine the Appropriate Venting Size and Materials
Consult your wood stove’s manual to determine the correct vent pipe size. Use high-quality materials, such as stainless steel or double-walled pipes, designed for wood stove applications.
3. Prepare the Wall for the Vent Opening
Mark the location where the vent will exit the wall. Cut a hole through the wall that accommodates the vent pipe, ensuring it is level and properly aligned.
4. Install the Horizontal Vent Pipe
Insert the vent pipe through the opening, ensuring it slopes slightly downward away from the stove to prevent condensation buildup. Secure the pipe in place according to the manufacturer’s instructions.
5. Connect the Vent Pipe to the Wood Stove
Attach the other end of the vent pipe to the wood stove’s flue outlet. Use appropriate connectors and sealants to ensure a tight fit.
6. Seal and Secure the Vent Pipe
Use high-temperature silicone sealant to seal any gaps between the vent pipe and the wall. Secure the pipe with brackets or straps as needed to prevent movement.
7. Test the Venting System
Once installed, test the venting system by lighting a small fire in the wood stove. Check for any leaks or issues with airflow.
Related Post: Wood Stove Venting Requirements
Factors to Consider When Choosing Horizontal Venting
When selecting a horizontal venting system, consider the following factors:
- Always check the manufacturer’s guidelines regarding venting requirements.
- Ensure compliance with local regulations, which may dictate specific venting configurations.
- Use high-quality materials designed for high-temperature applications to ensure safety and longevity.
Benefits of Wood Stove Horizontal Venting
Improved Efficiency and Heat Output
One of the primary benefits of horizontal venting is improved efficiency. By allowing exhaust gases to exit the home more directly, horizontal systems can enhance the overall heat output of the stove.
This means you can enjoy a warmer home while using less wood, ultimately saving you money on fuel costs.
Flexible Installation Options
Horizontal venting provides flexibility in installation, making it suitable for various home layouts. Whether you have a basement, a small living room, or a unique architectural design, horizontal venting can often be adapted to fit your needs without the need for extensive modifications.
Enhanced Safety and Reduced Fire Risk
Properly installed horizontal venting systems can reduce the risk of chimney fires and ensure that harmful gases are effectively expelled from your home.
By following best practices for installation and maintenance, you can create a safer environment for your family.
Horizontal Venting vs. Vertical Venting
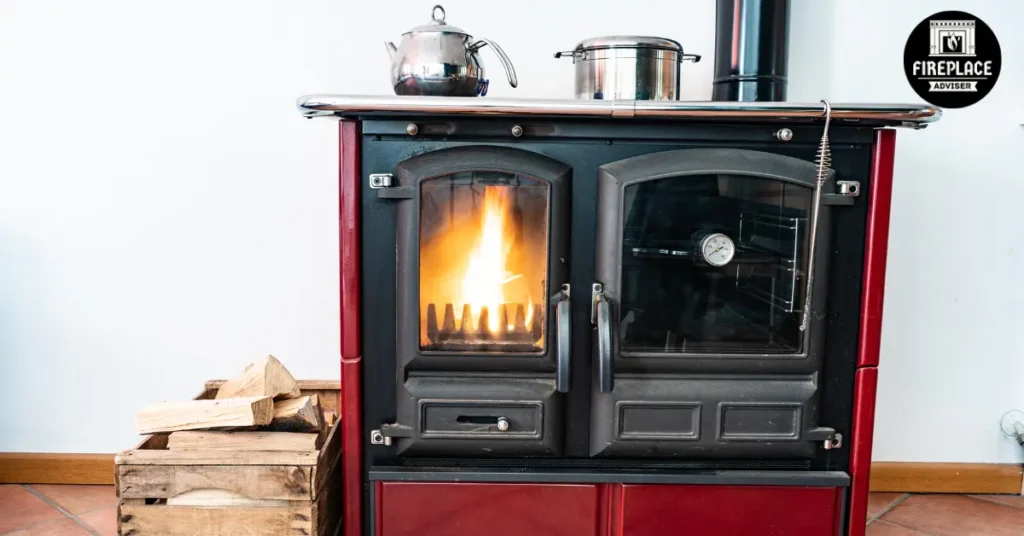
When venting wood stoves, two primary options are available: horizontal venting and vertical venting. Each method has distinct advantages and disadvantages that can affect installation, efficiency, and safety.
1. Vertical Venting
Advantages:
- Improved Draft: Vertical venting allows flue gases to rise naturally, enhancing draft performance. This is crucial for efficient combustion and reducing the risk of smoke backdrafting into the living space.
- Temperature Maintenance: As the gases travel upward, they remain warmer, which helps maintain the necessary temperature for effective venting. This reduces the likelihood of creosote buildup, a common issue in wood stove systems.
- Cost-Effectiveness: Generally, vertical installations can be less expensive than horizontal ones, especially when venting through the roof, as they often require fewer materials and less complex installation techniques.
Disadvantages:
- Installation Complexity: Vertical venting may require more structural considerations, such as support for the chimney, and can involve cutting through roofs, which might be challenging for some homeowners.
- Space Requirements: A vertical chimney system typically requires more vertical clearance and may not be feasible in homes with limited roof space or height restrictions.
2. Horizontal Venting
Advantages:
- Flexible Installation Options: Horizontal venting can be advantageous in situations where vertical venting is impractical, such as in single-story homes or where roof access is limited. It allows for venting through an exterior wall, which can be less intrusive.
- Aesthetic Considerations: For some homeowners, horizontal venting may be visually preferable, as it avoids the need to cut into the roof, preserving the home’s exterior appearance.
Disadvantages:
- Reduced Draft Efficiency: Horizontal venting can lead to a weaker draft since flue gases may cool and condense more quickly. This can result in poor combustion efficiency and increased creosote buildup if not properly installed.
- Installation Guidelines: Proper horizontal venting requires strict adherence to installation guidelines, including maintaining a slight upward slope (typically 1/4 inch per foot) and ensuring that the horizontal run does not exceed a certain percentage of the vertical run (often no more than 50%) to maintain efficiency.
- Potential for Blockages: The horizontal sections of the venting system are more susceptible to blockages from debris or condensation, necessitating regular maintenance and inspections
Related Post: Wood Stove Baffle Guide
Common Mistakes to Avoid
When installing a horizontal venting system, be aware of these common mistakes:
- Using the wrong size pipe can lead to inefficient venting and increased risk of backdrafts.
- Ensure the vent pipe maintains a slight downward slope to prevent condensation buildup.
- Adhere to clearance requirements to avoid fire hazards.
- Always use materials specifically designed for wood stove venting to ensure safety.
- Regularly inspect and clean your venting system to prevent creosote buildup and ensure optimal performance.
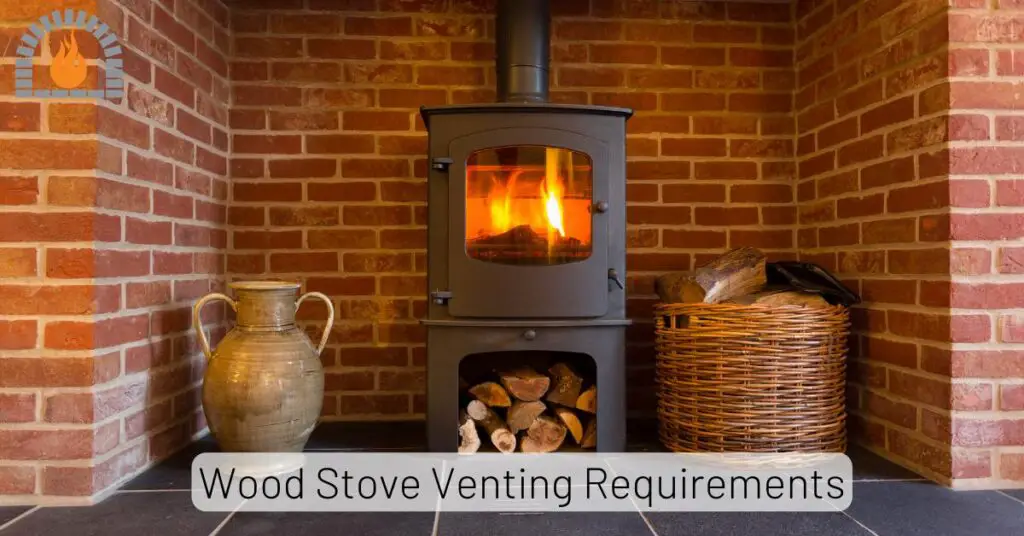
Wood Stove Venting Requirements
When installing a wood stove, proper venting is crucial to ensure safety, efficiency, and compliance with local building codes. Here are the key requirements and considerations for venting wood stoves.
Class A Chimneys
A Class A chimney is essential for venting wood stoves. This type of chimney consists of a stainless-steel inner and outer wall, often with insulation or an air channel in between.
It is designed to handle the high temperatures and byproducts of combustion, including smoke and gases. The preferred installation method is vertical through the roof, as this maintains a warmer interior, promoting better draft and efficiency.
Stove Pipe Types
The connection between the wood stove and the chimney typically involves either single-wall or double-wall stovepipe:
- Single-Wall Stovepipe: Generally made of 24 or 22 gauge steel, it requires a clearance of 18 inches from combustible materials.
- Double-Wall Stovepipe: Constructed with an insulated design, it requires only 6 inches of clearance, making it a safer option in tighter spaces, although it tends to be more expensive.
Installation Considerations
Clearances
Clearances from combustible materials are critical. For instance, the top of the stove should be at least 36 inches away from unprotected ceilings. If using protective materials like asbestos millboard, this distance can be reduced significantly.
Additionally, stovepipes must be spaced appropriately from walls and other combustibles to prevent fire hazards.
Fresh Air Intake
A fresh air intake is often recommended, particularly for modern wood stoves installed in tightly sealed homes. This intake allows outside air to fuel the fire, preventing the stove from depleting indoor oxygen levels and maintaining efficient combustion.
The size of the air vent required increases with the stove’s output, typically around 550 square millimeters of vent area per kilowatt of stove output.
Maintenance
Regular maintenance is essential for safe operation. It is advised to inspect the chimney and stovepipe annually to check for blockages, creosote build-up, and structural integrity.
Cleaning the chimney before each heating season is also recommended to prevent chimney fires and ensure optimal performance
FAQs
Is horizontal venting safe for wood stoves?
Yes, horizontal venting is a safe and effective option when installed correctly and maintained properly.
How long does horizontal venting last?
The lifespan of horizontal venting depends on the materials used and proper maintenance. High-quality stainless-steel venting can last for many years with regular cleaning.
Can I use horizontal venting with any wood stove?
Most wood stoves are compatible with horizontal venting, but it’s essential to check the manufacturer’s specifications and local building codes.
How do I clean horizontal venting?
Regular cleaning is necessary to remove creosote buildup and ensure proper airflow. Use a chimney brush and a flexible rod to clean the vent pipe from the exterior wall opening.
Is horizontal venting more expensive than vertical venting?
The cost of horizontal venting can vary depending on the materials and complexity of the installation. In some cases, it may be more cost-effective than vertical venting due to reduced installation requirements.
Affiliate Disclosure: Fireplaceadviser.com is a participant in the Amazon Services LLC Associates Program. We may earn a commission when you click on certain links on this site and purchase.

Hello!! I am Jamal Khan. I often fix my home electric heaters and gas stove problems and research the common issues in the heating units to improve my knowledge and expertise. The aim of establishing fireplaceadviser.com is to share my expertise and knowledge with my audience.


