When it comes to installing a gas fireplace, venting is one of the most crucial aspects to get right. Not only does proper venting ensure your fireplace operates efficiently, but it’s also vital for safety. Did you know that improper venting can reduce a gas fireplace’s efficiency by up to 30%?
In this guide, we’ll dive deep into everything you need to know about gas fireplace vents, complete with clear diagrams and step-by-step instructions.
Whether you’re a DIY enthusiast or just curious about how your gas fireplace works, this comprehensive guide will help you understand the installation process and avoid common mistakes that could lead to costly repairs or safety hazards down the line.
M&G DuraVent Vent Pipe, 4 x 6-5/8, Galvanized
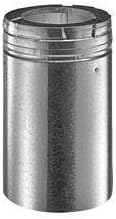
- Designed for use with gas direct vent stoves, heaters, and fireplaces.
- Efficiently vents flue gases
- Features a .020″ aluminum inner wall
- 018″ galvanized steel outer wall for long-lasting
- Measures 4″ inner diameter (ID)
- 6 5/8″ outer diameter (OD)
- 60″ in length
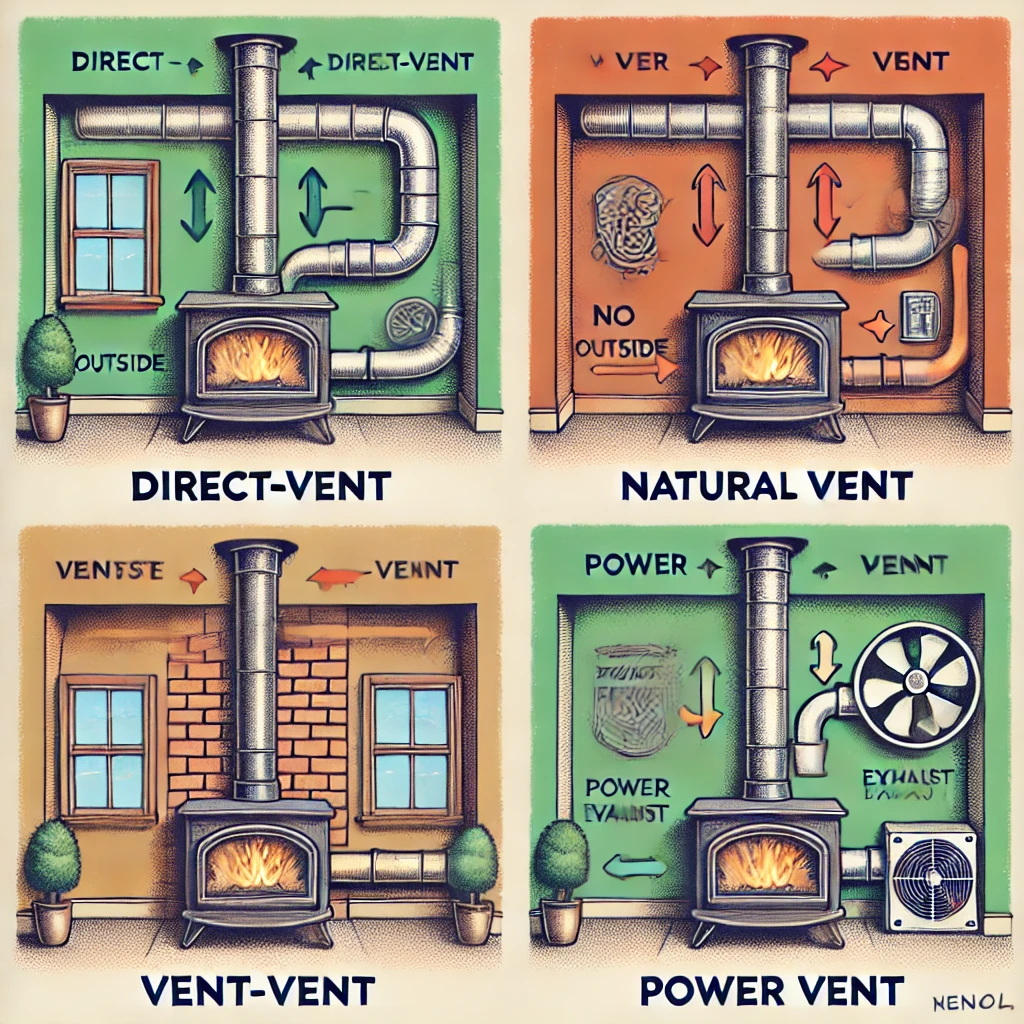
Types of Vents for Gas Fireplaces
| Vent Type | Efficiency | Heat Loss | Installation Cost | Indoor Air Quality |
|---|---|---|---|---|
| Direct-Vent | Up to 85% | Minimal | Moderate | Excellent |
| B-Vent (Natural) | 50-60% | High | Low | Fair |
| Vent-Free | Close to 99% | None | Low | Poor |
| Power Vent | 75-85% | Minimal | High | Excellent |
1. Direct-Vent
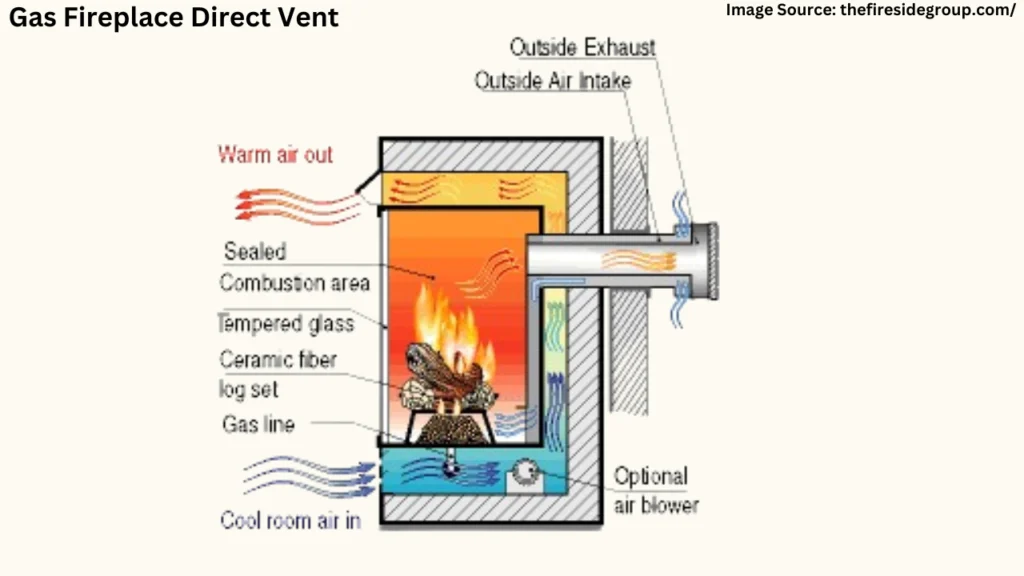
Gas fireplace exhaust Direct-vent exhaust use a sealed combustion system. They draw air from outside the home for combustion and vent exhaust gases directly outside through a coaxial pipe (a pipe within a pipe).
The outer pipe brings in fresh air while the inner pipe exhausts the gases.
- Efficiency: Up to 85%
- Heat Loss: Minimal, since they use outside air and retain more heat inside the home.
- Cost: Moderate installation and running costs.
Benefits:
- Highly efficient with reduced heat loss.
- Safe for indoor air quality as no combustion gases enter the room.
- Works well in both newly constructed and existing homes.
Risks:
- Can be expensive to install, requiring professional help for correct venting.
- May not provide the traditional “open flame” ambiance that some homeowners prefer.
Best For:
- Living Rooms and Bedrooms in Modern Homes
- Cold Climates
- Homes with No Existing Chimneys
2. Natural Vent (B-Vent)
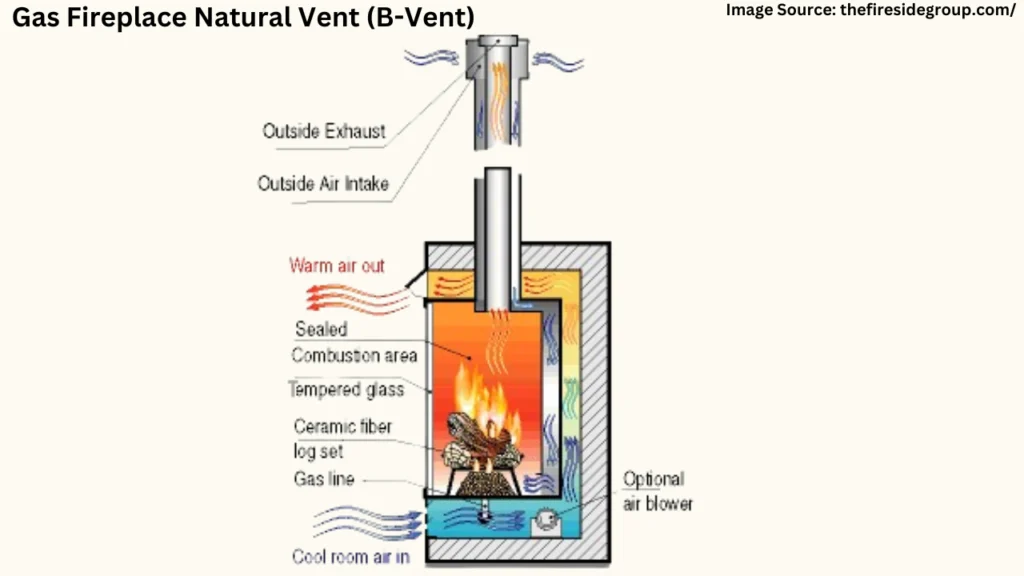
Gas fireplace B-vent, or natural vent, rely on the home’s internal air for combustion and vent exhaust gases through a chimney or flue to the outside. These gas fireplace exhaust vents are less efficient due to heat loss through the chimney.


- Efficiency: Around 50-60%
- Heat Loss: High, as warm indoor air escapes through the chimney.
- Cost: Lower installation costs but higher operating expenses due to lower efficiency.
Benefits:
- More traditional design and feel, often featuring an open flame.
- Typically less expensive to install than direct-vent systems.
Risks:
- Significant heat loss through the chimney.
- Can affect indoor air quality as it pulls combustion air from inside the house.
- Less efficient, meaning higher long-term operating costs.
Best For:
- Older Homes with Existing Chimneys
- Warmer Climates
- Supplemental Heating
3. Vent-Free
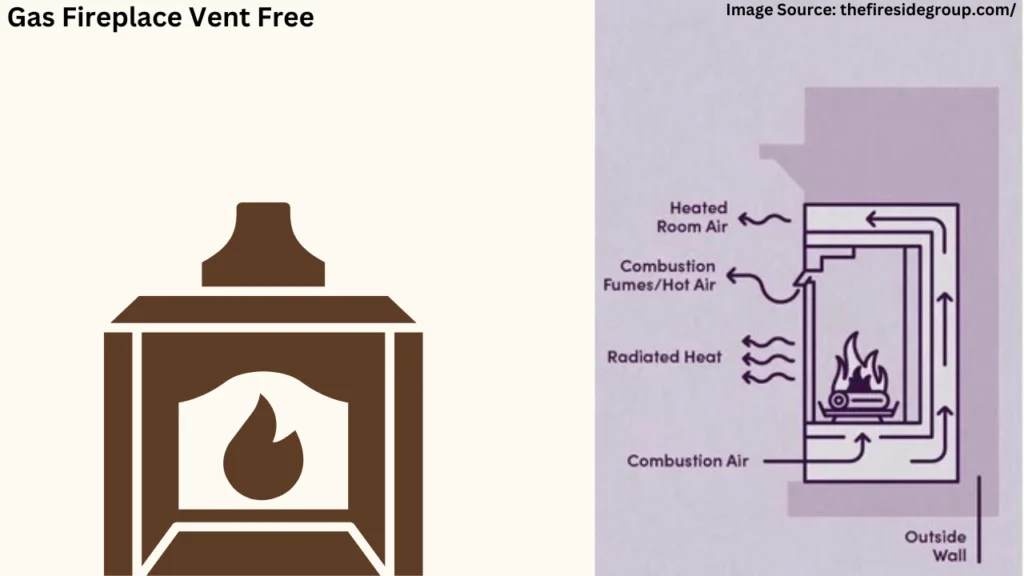
Vent-free gas fireplace venting doesn’t require any venting system, as they are designed to burn fuel so efficiently that virtually no combustion byproducts are produced.
They release a small amount of exhaust directly into the room, which raises concerns about air quality.
- Efficiency: Close to 99%, since no heat is lost through venting.
- Heat Loss: None, making it highly efficient for heating a room.
- Cost: Low installation costs due to the absence of a vent system.
Benefits:
- Highly efficient, as all the heat is retained in the room.
- Easy and inexpensive to install, with no need for a vent or chimney.
- Ideal for rooms where venting is difficult or impossible.
Risks:
- Can impact indoor air quality by releasing moisture and combustion gases.
- Often banned or restricted in certain areas due to potential safety concerns.
- May not be suitable for people with respiratory conditions.
Best For:
- Small, Well-Ventilated Spaces
- Warmer Climates or Temporary Use
- Homes with No Chimney or Venting Options
4. Power Vent Gas Fireplaces
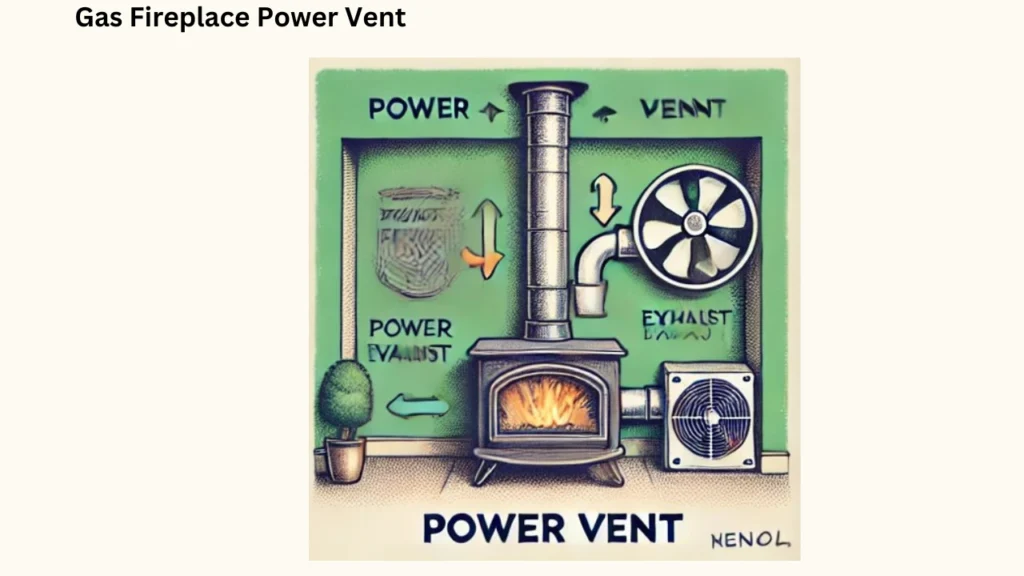
Power vent gas fireplace exaust use a fan or blower to expel combustion gases through a side wall or roof.
This venting system allows more flexible placement since it can vent horizontally or vertically, unlike traditional chimney systems.
- Efficiency: 75-85%, depending on the installation.
- Heat Loss: Minimal, since exhaust is pushed out efficiently.
- Cost: Higher installation cost due to the fan mechanism and extra electrical requirements.
Benefits:
- Flexibility in placement, as it doesn’t require a traditional vertical chimney.
- Efficient heat retention with a sealed combustion process.
- Safe and effective in tightly sealed homes.
Risks:
- More complex and expensive to install.
- Requires electricity to operate, so it won’t work during power outages without a backup power source.
Best For:
- Modern Homes and High-Efficiency Buildings
- Homes with Complex Layouts
- Homes with Tight Spaces
Direct-Vent Gas Fireplace Installation
Installing a direct-vent gas fireplace requires careful planning and attention to detail to ensure a safe and efficient setup.
Tools You’ll Need:
- Brad nail gun
- Caulk gun
- Circular saw
- Cordless drill
- Drill bit set
- Drywall sander
- Drywall saw
- Dust mask
- Hammer
- Hearing protection
- Knee pads
- Level
- Tape measure
- Tin snips
- Utility knife
Materials Required:
- Direct-vent gas fireplace unit
- 9″ double-walled vent pipe
- Two pieces of 2×10 lumber for the platform
- 3/4″ plywood for the platform surface
- Drywall and joint compound for finishing
- Silicone and polyurethane caulk for sealing
Step-by-Step Installation Process:
1. Planning and Preparation
Start by selecting the location where the fireplace will be installed, keeping in mind the venting route. The vent can either run horizontally through an exterior wall or vertically through the roof.
Be sure to review your local building codes and obtain any required permits before proceeding.
2. Building the Platform
You’ll need to construct a sturdy platform for the fireplace:


- Cut two pieces of 2×10 lumber to a height of 11.5 inches.
- Nail them together securely and top it off with a piece of 3/4″ plywood to form the platform.
3. Framing the Wall Opening
Follow the manufacturer’s guidelines to frame the wall opening where the fireplace will be placed. It’s important that the dimensions match the specifications of the fireplace unit to ensure a proper fit.
4. Setting Up Gas and Electrical Connections
Before installing the fireplace, ensure the gas line is routed to the installation area. If your fireplace has any electrical components, such as a blower, have an electrician handle the wiring to guarantee a safe and reliable connection.
5. Positioning the Fireplace
Carefully position the fireplace on the platform. Apply a bead of manufacturer-recommended sealant around the collar to prevent gas leaks. This is an essential step for ensuring safety and efficiency.
6. Vent Pipe Installation
Now it’s time to install the vent pipe:
- Begin by applying appliance sealant to the inner wall of the first section of vent pipe.
- Connect each section by aligning the dimples with the channels on the flue collar. Twist the sections together until they lock securely in place.
7. Finalizing the Installation
After securing the vent and positioning the fireplace:
- Make sure the clearances from combustible materials are met—typically, 1/2 inch from the sides and back, and 3.5 inches from the top.
- Install any heat shields or drip caps as required by your unit’s installation manual to protect against heat damage.
Natural Vent (B-Vent) Gas Fireplace Installation
Installing a natural vent (B-vent) gas fireplace involves specific steps to ensure safe and efficient operation.
Tools Required
- Circular saw
- Cordless drill
- Drill bit set
- Level
- Tape measure
- Tin snips
- Utility knife
- Caulk gun
- Hammer
- Screwdriver
Materials Required
- B-vent gas fireplace unit
- B-vent pipe (single or double-walled as required)
- 2×10 lumber for the platform (if needed)
- 3/4″ plywood for the platform top (if needed)
- Gas line materials (copper or flexible gas line)
- Silicone caulk for sealing joints
- Drywall and joint compound for finishing
Installation Steps
1. Planning and Preparation
Before starting, decide on the location of the fireplace, considering factors like proximity to a gas line, existing chimney, and clearance from combustible materials. Ensure compliance with local building codes and obtain necessary permits.
2. Build a Platform (if necessary)
If your fireplace requires elevation:
- Cut two 2x10s to create a sturdy platform.
- Secure them together and cover with 3/4″ plywood.
3. Install Gas Supply
A certified professional should handle the installation of the gas line:
- Run a line from your main gas supply or propane tank to the fireplace location.
- Ensure that all connections are leak-proof and compliant with local regulations.
4. Framing the Opening
Create a framed opening in the wall where the fireplace will be installed, following the manufacturer’s specifications. This may involve:
- Cutting drywall and framing lumber to size.
- Ensuring that the opening is level and adequately supported.
5. Set Up Ventilation
Install the B-vent system:
- Connect the B-vent pipe to the fireplace unit.
- Ensure that the vent pipe is installed according to manufacturer guidelines, which may include vertical or horizontal runs.
Key Venting Considerations:
- Maintain clearances from combustible materials.
- Follow specifications regarding maximum bends in vent pipes.
- Ensure proper termination outside, considering distances from windows and doors.
6. Install the Fireplace
Position the fireplace in the framed opening:
- Use a level to ensure it is straight.
- Secure it in place as per manufacturer instructions, typically using screws or brackets.
7. Finalize Installation
Once installed, seal all joints where vent pipes connect using silicone caulk to prevent leaks. Ensure that any required heat shields are in place, especially if venting through walls or ceilings.
Gas Fireplace Power Vent Installation
Installing a gas fireplace power vent requires careful planning and adherence to local building codes and safety guidelines. Follow these steps to ensure a safe and successful installation.
Preparation
- Before you begin, thoroughly read the installation manual for your specific power vent model. This will provide important details about the components and requirements.
- Make sure you have all the necessary tools (screwdrivers, wrenches, etc.) and materials (vent pipes, screws, sealants) before starting.
Installation Process
1. Installing the Control Box
- Location: Mount the control box near an access panel that is at least 10” x 10” in size. Ensure the “This Side Up” label is positioned correctly.
- Secure the Box: Use screws to firmly attach the control box to a solid surface for stability.
2. Mounting the Power Vent
- Positioning: Install the power vent near the fireplace. Secure it with nailing flanges or wall straps for a strong mount.
- Connect Venting Components: Attach the vent pipes from the fireplace to the power vent’s exhaust inlet. Make sure the connections are tight, using aluminum tape if necessary to seal the joints.
3. Electrical Connections
- Wiring: Connect the power cable from the power vent to the control box. Use Romex 14/2 or a similar cable for wiring, and have a certified electrician handle this step to ensure safety.
- Check the Connections: Verify that all electrical connections are secure and comply with local electrical codes.
4. Configuring the Venting System
- Follow Manufacturer’s Guidelines: Use only the venting components recommended for your model, such as Simpson Duravent or Secure Vent systems. Depending on your setup, the venting system may be configured for either vertical or horizontal termination.
- Maintain Clearances: Ensure all clearances from combustible materials meet the specifications in your installation manual.
5. Final Checks and Testing
- Inspect the Connections: Double-check all mechanical and electrical connections to ensure they are secure and up to code.
- Test the System: Once everything is in place, power up the fireplace and power vent to confirm that both are working correctly.
Important Tips
- Always consult local building codes before starting the installation.
- If you’re unsure about any part of the process, consider hiring a professional to ensure safety and compliance.
- Installation steps may vary slightly depending on your fireplace and power vent model, so always refer to your manual.
Affiliate Disclosure: Fireplaceadviser.com is a participant in the Amazon Services LLC Associates Program. We may earn a commission when you click on certain links on this site and purchase.

Hello!! I am Jamal Khan. I often fix my home electric heaters and gas stove problems and research the common issues in the heating units to improve my knowledge and expertise. The aim of establishing fireplaceadviser.com is to share my expertise and knowledge with my audience.