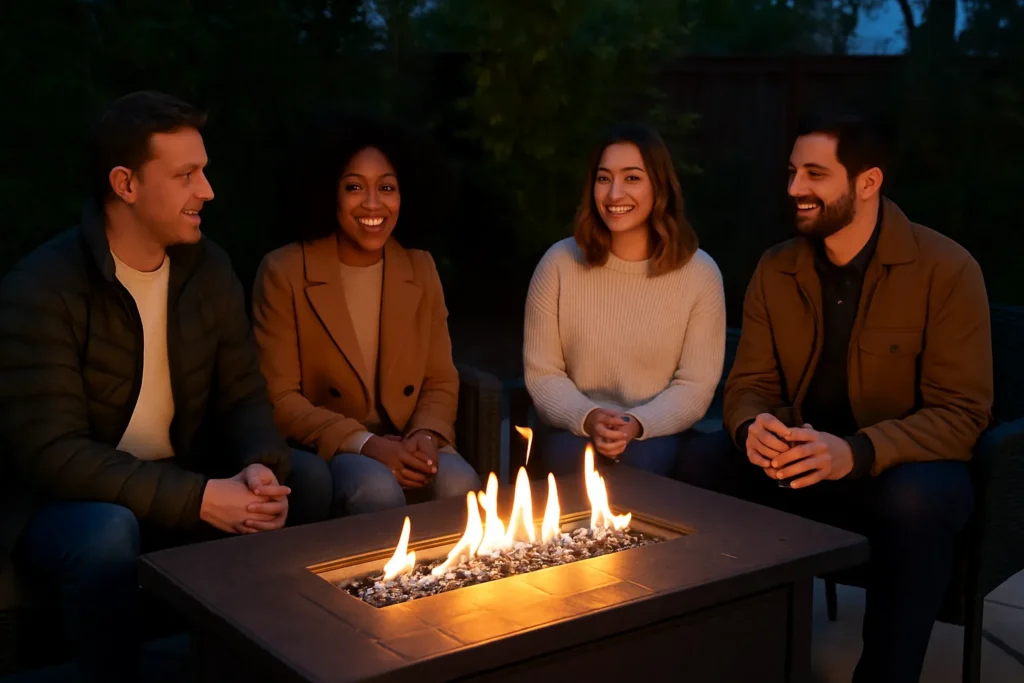
A cement fire pit is a durable, cost-effective, and customizable addition to any outdoor living space that provides warmth, ambiance, and a focal point for social gatherings.
Whether you’re a seasoned DIY enthusiast or a beginner looking to enhance your backyard, building a cement fire pit offers a rewarding project that can be completed in a weekend with proper planning and execution.
This comprehensive guide will walk you through every step of the process, from selecting the right materials and tools to construction techniques, safety considerations, and finishing touches that will make your fire pit both functional and visually appealing.
Key Takeaways
- Cement fire pits are durable, weather-resistant, and can be customized to match any outdoor aesthetic
- Proper planning and site preparation are crucial for a safe and long-lasting installation
- The right materials and tools will make the construction process smoother and ensure better results
- Safety considerations, including local regulations and proper ventilation, must be addressed before building
- Regular maintenance will extend the life of your fire pit and keep it looking great for years


Why Choose a Cement Fire Pit?
When considering outdoor fire features, a cement fire pit offers numerous advantages over other materials. Cement (often used interchangeably with concrete in DIY contexts) provides exceptional durability and can withstand high temperatures without cracking or deteriorating when properly constructed.
Unlike metal fire pits that may rust or stone ones that can shift over time, a well-built cement fire pit will maintain its integrity for decades.
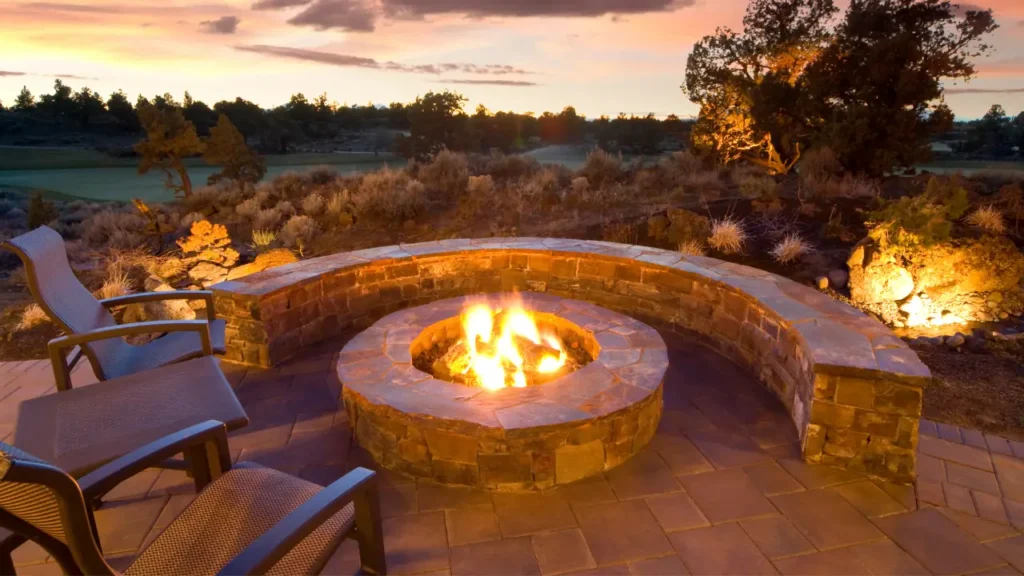
Cement also offers unparalleled design flexibility. Whether you prefer a modern, minimalist look or a more rustic appearance, cement can be formed, textured, and colored to match your vision. The material’s versatility allows you to create anything from a simple bowl design to an elaborate multi-tiered structure with seating areas.
From a cost perspective, cement fire pits are typically more economical than prefabricated metal or stone options, especially if you’re willing to put in the DIY work. The materials are readily available at most home improvement stores, and the construction techniques are accessible to most homeowners with basic handy skills.


Planning Your Cement Fire Pit
Location Selection
Choosing the right location for your fire pit is perhaps the most critical decision you’ll make. Consider the following factors:
- Safety Distance: Place your fire pit at least 10-20 feet away from structures, trees, and other flammable materials
- Wind Direction: Position the pit where prevailing winds won’t blow smoke toward seating areas or your home
- Utility Lines: Check for underground utilities before digging (call 811 in the US for a free utility marking service)
- Accessibility: Ensure the location is easily accessible but doesn’t interfere with foot traffic patterns
- Viewing Angles: Consider how the fire pit will look from various vantage points, both inside and outside your home
Design Considerations
Before breaking ground, sketch out your design ideas. Consider:
- Size: A typical fire pit ranges from 36-44 inches in diameter, which provides ample space for a fire while allowing for conversation across the pit
- Shape: While circular designs are most common, square and rectangular options can complement modern landscapes
- Height: Most fire pits stand 12-18 inches above ground level, providing a good balance between visibility and safety
- Style: Decide whether you want a modern, rustic, or traditional aesthetic to match your outdoor space
Local Regulations and Permits
Before starting construction, research local regulations regarding outdoor fire pits. Many municipalities have specific requirements regarding:
- Setback distances from structures
- Fire pit size limitations
- Burn bans during certain times of year
- Permits required for permanent installations
Contact your local building department or fire marshal to ensure compliance with all applicable codes and regulations.
Materials Needed
| Material Type | Purpose | Recommended Product/Quantity |
|---|---|---|
| Portland Cement | Primary binding agent | 1-2 bags (94 lbs each) |
| Sand | Mixed with cement for mortar | 200-300 lbs |
| Gravel | For drainage and base | 400-500 lbs |
| Concrete Mix | For the main structure | 10-15 bags (60 lbs each) |
| Fire-resistant mortar | For interior fire brick lining | 1-2 buckets |
Reinforcement Materials
- Rebar (1/2″ diameter) for structural integrity
- Wire mesh to reinforce concrete and prevent cracking
- Metal fire ring or insert to protect the interior cement walls
Finishing Materials
- Fire bricks for the interior wall (highly recommended)
- Exterior stone, tile, or stucco for finishing (optional)
- Concrete sealer for weather protection
- Pigment or stain (if adding color to your cement)
Tools Required
| Tool | Purpose |
|---|---|
| Shovel | For digging and moving materials |
| Wheelbarrow | For mixing and transporting concrete |
| Tape Measure | For accurate dimensions |
| Level | To ensure even surfaces |
| Trowel | For finishing concrete surfaces |
| Float | For smoothing concrete |
| Hammer | For building forms |
| Saw | For cutting form materials |
| Drill | For assembling forms |
| Safety Equipment | Gloves, goggles, dust mask |
Optional but Helpful Tools
- Concrete mixer (rentable) for larger projects
- Cement finishing tools for professional results
- Masonry chisel and hammer for shaping
- Rubber mallet for positioning bricks or stones
Safety Considerations
Personal Safety
When working with cement and concrete, protect yourself with:
- Heavy-duty gloves to prevent skin contact with wet cement, which can cause chemical burns
- Safety goggles to protect eyes from dust and debris
- Dust mask to avoid inhaling cement particles
- Long sleeves and pants to minimize skin exposure
- Sturdy, closed-toe boots with good traction
Fire Safety
A properly constructed fire pit includes several safety features:
- Heat-resistant materials: The interior should be lined with fire bricks or a metal fire ring to protect the cement from extreme heat
- Proper ventilation: Include air vents at the base of the fire pit to ensure adequate airflow
- Non-combustible base: The area beneath and around the fire pit should be covered with gravel, pavers, or other non-combustible materials
- Spark screen: Consider adding a mesh cover to contain embers
Building Codes and Best Practices
Adhering to building codes and best practices ensures your fire pit is safe and legal:
- Follow local regulations regarding size, placement, and materials
- Include proper drainage to prevent water accumulation
- Ensure the fire pit walls are thick enough to contain heat safely
- Create a level, stable base to prevent tipping
Step-by-Step Construction Guide
Site Preparation
- Mark the Area: Use spray paint or stakes and string to outline the fire pit’s location and size
- Excavate the Site: Dig a hole approximately 6-8 inches deep within your marked area
- Create a Level Base: Ensure the excavated area is perfectly level using a long level or transit level
- Add Gravel Layer: Fill the excavated area with 4 inches of compacted gravel for drainage
Building the Base
- Build a Form: Create a circular form using flexible hardboard or plywood strips held in place with stakes
- Add Reinforcement: Place a layer of wire mesh or rebar in the form, elevating it slightly so it will be suspended in the middle of the concrete
- Mix Concrete: Prepare concrete mix according to package directions, aiming for a consistency similar to oatmeal
- Pour Concrete: Fill the form with concrete, using a shovel or hoe to distribute it evenly
- Level and Smooth: Use a screed board to level the concrete, then smooth with a trowel
- Create Drainage Holes: Insert short pieces of PVC pipe at several points around the perimeter for water drainage
- Cure the Base: Allow the base to cure for at least 48 hours before proceeding
Creating the Form for Walls
- Design the Wall Form: Determine the desired height and thickness of your fire pit walls (typically 6-8 inches thick)
- Build Inner and Outer Forms: Create two circular forms—one for the interior diameter and one for the exterior—using plywood or hardboard
- Secure the Forms: Use stakes or braces to hold the forms firmly in place, ensuring they’re level and the proper distance apart
- Add Form Release: Apply a form release agent or oil to the inside of the forms to make removal easier later
Mixing and Pouring Cement
- Prepare the Mix: Combine cement, sand, and aggregate in the proper ratios (typically 1:2:3 for cement:sand:gravel)
- Add Water Gradually: Mix in water slowly until you achieve a workable consistency that holds its shape without being too wet
- Color the Concrete (Optional): If you want colored concrete, add pigment to the mix before adding water
- Pour in Layers: Fill the form space with concrete, working in layers no more than 2 feet high
- Tap the Forms: Gently tap the sides of the forms with a hammer to eliminate air bubbles
- Screed the Surface: Use a straight board to level the concrete at the top of the forms
Adding Reinforcement
- Place Vertical Rebar: Insert vertical rebar rods into the wet concrete at regular intervals around the circle
- Add Horizontal Reinforcement: As you build up the layers, add horizontal rebar or wire mesh for additional strength
- Consider a Fire Ring: Position a metal fire ring or insert in the center of the form before the concrete sets if using one
Curing Process
- Initial Curing: Allow the concrete to set for 24-48 hours before removing the forms
- Slow Drying: Keep the concrete damp for the first week by covering it with plastic and misting with water daily
- Full Strength Development: Wait at least 7 days before building a fire in the pit, though 28 days is ideal for maximum strength
Removing Forms
- Careful Removal: After the initial curing period, carefully remove the forms by loosening the braces and gently pulling them away
- Fix Imperfections: Fill any small voids or imperfections with additional concrete mix and smooth with a trowel
- Edge Finishing: Use an edging tool to create smooth, rounded edges along the top of the fire pit walls
Finishing Touches
- Interior Fire Brick Lining: Line the interior of the fire pit with fire bricks using fire-resistant mortar for added heat protection
- Exterior Finishing: Apply stucco, stone veneer, or tile to the exterior if desired
- Sealing: Apply a concrete sealer to protect the surface from moisture and stains
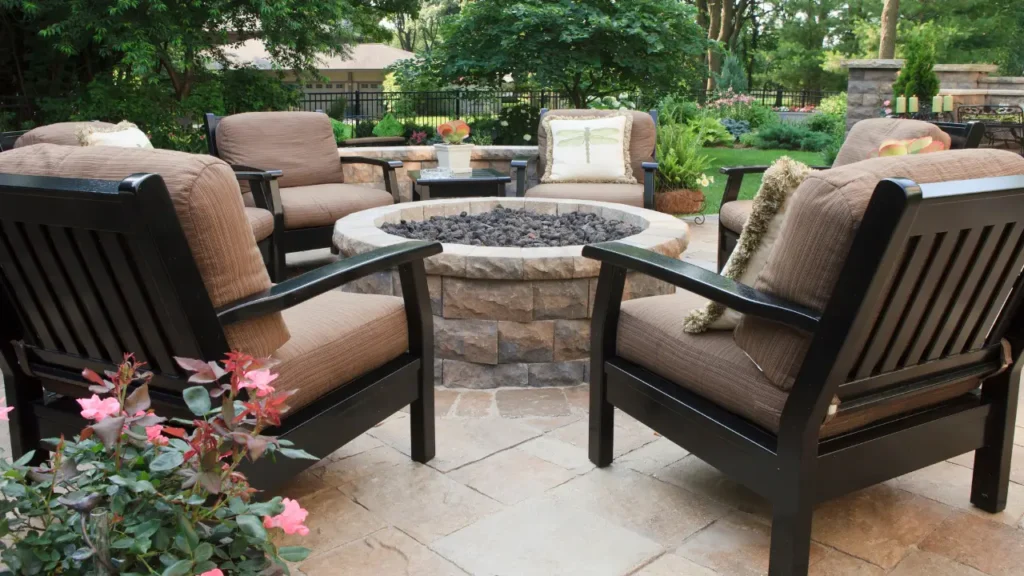
- Add Decorative Elements: Consider adding decorative glass beads, lava rocks, or other fire-safe materials to the base of the pit
Design Ideas and Inspiration
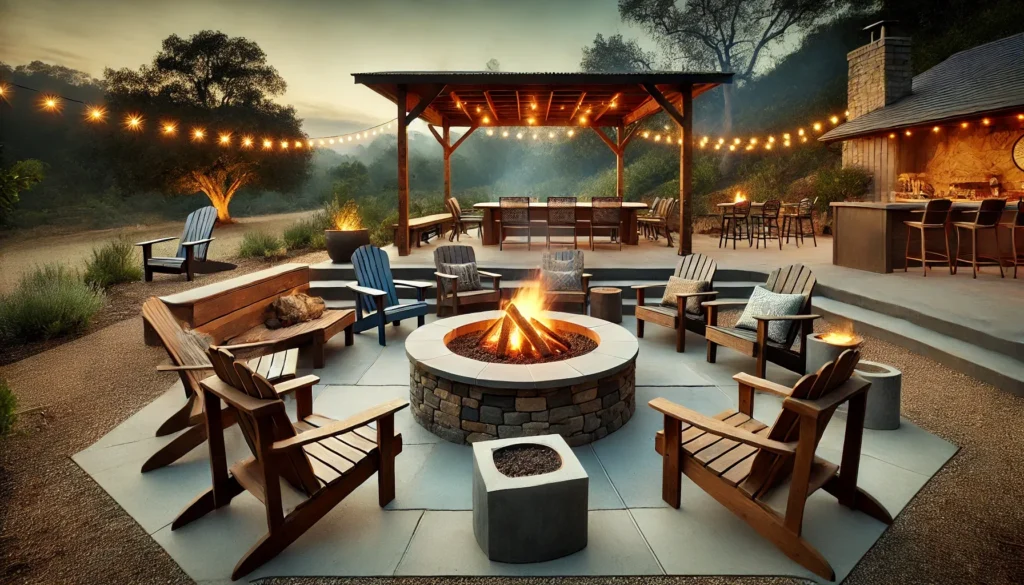
Modern Cement Fire Pit Designs
Modern designs often feature clean lines, geometric shapes, and minimal ornamentation. Consider:
- A simple, low-profile square or rectangular pit with a smooth, gray finish
- A cantilevered design that extends beyond the base for a floating appearance
- Integrated seating that matches the fire pit for a cohesive look
Rustic and Natural Styles
For a more natural appearance that blends with the landscape:


- Rough-textured concrete that mimics natural stone
- Irregular, organic shapes rather than perfect circles or squares
- Incorporation of natural stone elements around the base or top edge
Multi-Functional Fire Pits
Maximize the utility of your outdoor space with:
- Fire pits with built-in coolers for beverages
- Designs that include a grill grate for cooking
- Fire pit tables with a raised edge for placing drinks or food
Maintenance Tips
Regular Cleaning
- Remove ashes and debris after each use, once completely cool
- Wash the exterior with mild soap and water as needed
- Avoid harsh chemicals or pressure washers that could damage the concrete
Seasonal Care
- Before winter, clean the pit thoroughly and ensure it’s completely dry
- Consider using a breathable cover to protect against precipitation while allowing moisture to escape
- In spring, inspect for any cracks or damage that may have occurred during winter
Long-Term Preservation
- Reapply concrete sealer every 1-2 years, or as recommended by the product manufacturer
- Repair small cracks promptly with concrete patch products to prevent water infiltration
- Avoid using water on hot concrete to prevent thermal shock and cracking
Troubleshooting Common Issues
Cracking
Small hairline cracks are normal in concrete structures, but larger cracks may indicate problems:
- Prevention: Proper reinforcement, control joints, and curing techniques minimize cracking
- Repair: Fill cracks with concrete patch products, following manufacturer instructions
- When to Worry: Cracks wider than 1/4 inch or those that continue to expand may require professional assessment
Spalling (Surface Flaking)
Spalling occurs when the surface of the concrete peels or flakes away:
- Causes: Often due to freeze-thaw cycles, improper curing, or deicing chemicals
- Prevention: Proper sealing and avoiding deicing chemicals near the fire pit
- Repair: Remove loose material and apply a concrete resurfacer
Staining
Concrete can be stained by various substances:
- Organic Stains: Clean with a solution of water and mild detergent
- Rust Stains: Use commercial rust removers designed for concrete
- Oil Stains: Apply a degreaser specifically formulated for concrete surfaces
You May Also Like:
FAQs
How long does it take to build a cement fire pit?
The actual construction time for a basic cement fire pit is typically 2-3 days, spread over a couple of weekends. This includes site preparation, building forms, pouring concrete, and finishing. However, you’ll need to account for curing time, which requires at least 7 days before using the fire pit, with 28 days being ideal for maximum strength.
Can I build a cement fire pit on a wooden deck?
Building a cement fire pit directly on a wooden deck is not recommended due to the significant fire hazard. If you want a fire feature on your deck, consider a properly elevated fire pit with a non-combustible base and heat shield, or a prefabricated fire pit specifically designed for deck use with proper clearance from the deck surface.
What’s the difference between cement and concrete for a fire pit?
While often used interchangeably in conversation, cement is actually an ingredient in concrete. Cement is the powder that, when mixed with water, binds aggregates (sand and gravel) together to create concrete. For fire pit construction, you’ll typically use concrete (which contains cement) for the main structure, possibly with additional fire-resistant materials for the interior surfaces.
Do I need to use fire bricks inside my cement fire pit?
While not absolutely necessary, using fire bricks to line the interior of your cement fire pit is highly recommended. Fire bricks are specially formulated to withstand extremely high temperatures without cracking or deteriorating. They protect the structural concrete from direct heat exposure, significantly extending the life of your fire pit and improving safety.
Final Thoughts
Building a cement fire pit is a rewarding DIY project that adds both function and beauty to your outdoor living space. With proper planning, the right materials, and attention to safety details, you can create a durable, attractive feature that will provide enjoyment for years to come. Whether you’re gathering with family on cool evenings or entertaining friends, your custom cement fire pit will become the centerpiece of your backyard landscape.
Remember to follow local regulations, prioritize safety at every step, and don’t rush the curing process—patience during construction will result in a better final product. With the comprehensive guidance provided in this article, you’re well-equipped to tackle this project with confidence and create a fire pit that perfectly suits your style and needs.
Affiliate Disclosure: Fireplaceadviser.com is a participant in the Amazon Services LLC Associates Program. We may earn a commission when you click on certain links on this site and purchase.

Hello!! I am Jamal Khan. I often fix my home electric heaters and gas stove problems and research the common issues in the heating units to improve my knowledge and expertise. The aim of establishing fireplaceadviser.com is to share my expertise and knowledge with my audience.